My nephew is a HUGE fan of Angry Birds, so this year when his 5th birthday rolled around, my sister-in-law decided to do Angry Birds as the theme for his party.
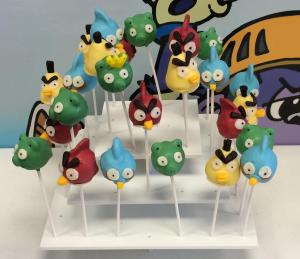
She’s really big into cake decorating as well, so I asked if there was anything I could make that would go along with the theme…and we decided on cake pops. And I’ll be honest, after these little guys were put together and were sitting on the kitchen counter, I laughed at them every time I walked in the room, because they were just so incredibly cute. There are some tutorial videos on YouTube that were a tremendous help for these cake pops. Although the videos I watched had candy as the little decorations, I decided to work with the molding chocolate that my sister-in-law made and used for all the decorations on the cake after she had put everything together. She kept telling me about how great the molding chocolate was to work with, and how much she liked it better than fondant…AND it tasted so much better, too. Come on, it’s chocolate! Of course it’s going to taste better than fondant, right?
So, for all of these little guys, I handmade the eyes, beaks, eyebrow, etc. from the molding chocolate. With the beaks and the little hair patches on top of the yellow birds, I set those in the refrigerator for a few minutes for those to harden before sticking them into the chocolate. This made the process easier for them to set.
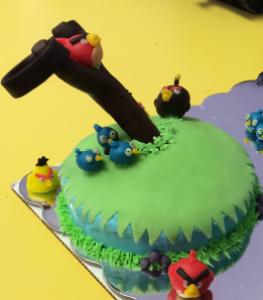
For the cake, I can’t get over how amazing of a job my sister-in-law did on this. She started making all of the birds, pigs, and other little props about two weeks before the party. This allowed her enough time to work on all of the details of the birds and props, and for them to set as well before placing on the cake.
Literally every single prop on this cake is molding chocolate…which means the kids at the party got to eat them, too! She also covered the cake with the molding chocolate…rolled it out just like fondant and placed it on top of the cakes.
I had the pleasure of eating a slice, and it was delicious. Usually when I have a slice of cake that is covered with fondant, it gets separated from the cake and isn’t eaten…but that certainly wasn’t the case this time.
I love how she made a slingshot and put the red bird in here. This is also made out of molding chocolate, and she formed it around a wooden skewer, then placed it at an angle in the cake. The birds and other props are attached with icing.
Yep, you guessed it…the 5 is also made with the molding chocolate. It’s soft enough to be able to stick candles in the top as you can see here.
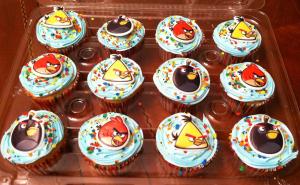
Since the party took place on a weekend, she still wanted to do something special for her little birthday boy and his friends at school, so she just made some cupcakes, topped them with blue icing, multi-colored sprinkles, and picked up these Angry Birds cupcake toppers at the store and sent them to school with him for his friends to enjoy as well. Simple and cute!
Chocolate Clay (Modeling Chocolate) Recipe: (from cakecentral.com)
Ingredients
*10 ounces semisweet chocolate (coarsely chopped chunks or chips)
1/3 cup light corn syrup
*Note: the chocolate can be substituted with almond bark, or colored candy disks to create different colored flowers
Instructions
Using Microwave: In a shallow bowl, melt the chocolate in microwave (be careful so that the temperature does not exceed 100 degrees F.) for 2 minutes; stir. If chocolate is not completely melted, return to microwave for 30 seconds at a time and stir until smooth.
Using Double Boiler: Place the chocolate in the top of a double boiler over hot water and stir until melted.
Add corn syrup to the chocolate and mix well (scrape all the corn syrup into the chocolate with a rubber spatula).
Using a rubber spatula, stir and fold mixture, scraping the sides and bottom of the bowl well, until no shiny syrup is visible and the mixture forms a thick ball.
Pour mixture onto a waxed paper sheet and spread with the spatula until it’s about 1/2-inch thick; let it sit and stiffen, uncovered, for about 2 hours.
Use at once or store in an airtight container at room temperature for up to 1 month.
Your Roses or bows will harden after a few days at room temperature and can be saved by storing in a cool, dry place.
THE MOST IMPORTANT THING TO REMEMBER IS NOT TO TOUCH THE CLAY TOO MUCH. IT GETS VERY STICKY AND BECOMES HARD TO HANDLE!


